How to use TailwindCSS with Electron


If you are already comfortable understanding what TailwindCSS is, feel free to skip this next section and jump straight into the implementation.
What is TailwindCSS?
Tailwind is a PostCSS plugin. Using Tailwind allows us to style our webpages with utilities which support consistent styling and allows us to only include the css styles we actually use.
Let's briefly explain the differences of a typical use-case of CSS compared with Tailwind - this will help us understand how Tailwind works (for those who are unfamiliar) and how Tailwind is configured in an Electron application.
This is a typical use of CSS on a webpage.
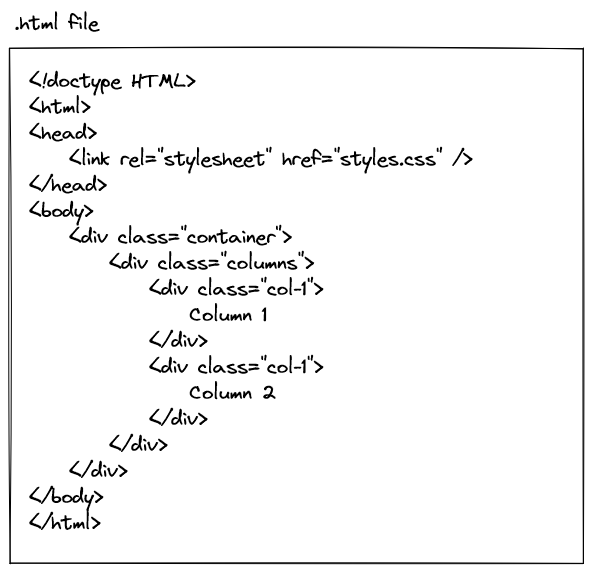
styles.css is the CSS file that is loaded within the HTML page, and gives the <div>s with matching classes a particular style. All of the styles that our webpage uses should be defined in styles.css, or any other CSS file we may include on our webpage.
If you were to choose a CSS framework other than Tailwind, you would likely import your CSS library like in the above example. The CSS library would include all possible classes in an external stylesheet. Everything would work just fine, however for the ones itching for more performance might think "my CSS stylesheets are loading styles that my HTML isn't using, is there a way I can reduce the size of my stylesheets in order to improve performance?" (Even though we are creating an Electron app, common performance improvements of a webpage still applies!).
This is where Tailwind comes in. When using Tailwind, you write CSS classes, and Tailwind generates a CSS file that only includes the CSS classes you've used.

The way that Tailwind does this "magic" is through AST (abstract syntax trees), but for our purposes we do not need to understand the details of ASTs, so long as we understand the basics of how Tailwind works.
Implementing TailwindCSS
Let's get started and install Tailwind by running npm i tailwindcss --save-dev. Once Tailwind is installed, run npx tailwindcss init to create a Tailwind config file. Tailwind is driven by the values in its configuration file, so let's take a look at what our command has generated.
tailwind.config.js
/** @type {import('tailwindcss').Config} */
module.exports = {
  content: [],
  theme: {
    extend: {},
  },
  plugins: [],
}
This configuration file is where we can extend the default values for Tailwind if they don't suit our needs, but the section we need to change is the "content" property. The content property defines the files where Tailwind will scan in order to generate a new CSS file. We will change this file to look at all html and jsx files in our application.
tailwind.config.js
/** @type {import('tailwindcss').Config} */
module.exports = {
  content: ["./app/src/**/*.{html,jsx}"],
  theme: {
    extend: {},
  },
  plugins: [],
}
In order that Tailwind be executed within our application, we will need to add Tailwind to be processed by Webpack. Tailwind is a PostCSS plugin, so we need to install postcss-loader. Install postcss-loader this by running the command npm i postcss-loader --save-dev. Add another entry to the "module.rules" array in our webpack configuration file so that the postcss-loader is the first executed loader (ie. is last in the array) before any other defined loaders.
webpack.config.js
const HtmlWebpackPlugin = require("html-webpack-plugin");
const path = require("path");

module.exports = {
    entry: "./app/src/index.jsx",
    output: {
        path: path.resolve(__dirname, "app/dist"),
        filename: "bundle.js"
    },
    module: {
        rules: [
            // loads .js/jsx/json files
            {
                test: /\.jsx?$/,
                include: [path.resolve(__dirname, "app/src")],
                loader: "babel-loader",
                resolve: {
                    extensions: [".js", ".jsx", ".json"]
                }
            },
            {
                // loads .html files
                test: /\.(html)$/,
                include: [path.resolve(__dirname, "app/src")],
                use: {
                    loader: "html-loader"
                }
            },
            {
                // loads .css files
                test: /\.css$/,
                include: [path.resolve(__dirname, "app/src")],
                use: [
                    "style-loader",
                    "css-loader",
                    "postcss-loader"
                ]
            }
        ]
    },
    plugins: [
        new HtmlWebpackPlugin({
            template: path.resolve(__dirname, "app/src/index.html"),
            filename: "index.html"
        })
    ]
};By using postcss-loader, we need to create a postcss.config.js at the root of our application. We will define in this configuration file to run Tailwind.
postcss.config.js
const tailwindcss = require("tailwindcss");

module.exports = {
    plugins: [
        tailwindcss("./tailwind.config.js")
    ]
};Now, we need to add Tailwind directives to a CSS file. It is these Tailwind directives that will get processed by postcss-loader (ultimately the tailwindcss package we installed), turning them into CSS styles that can be imported/used in our application. Create a new CSS file named index.css (or add the Tailwind directives to your existing index.css file).
app/src/index.css
@tailwind base;
@tailwind components;
@tailwind utilities;

html,
body {
    height: 100%;
}Ensure your application's main entry point imports index.css.
app/src/index.jsx
import React from "react";
import { createRoot } from "react-dom/client";
import "./index.css";
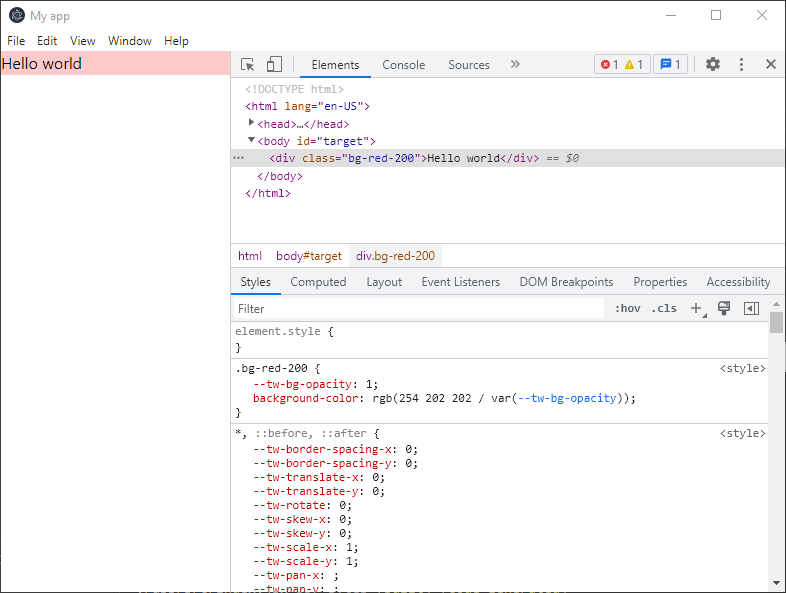
const container = document.getElementById("target");
const root = createRoot(container);
root.render(
<React.Fragment>
<div className="bg-red-200">Hello world</div>
</React.Fragment>
);
We will now see that our Electron app is able to load CSS from TailwindCSS!
Github repo
The following project can be found here on Github if you'd like to view the entire application and source code.